KlaudeCode-Devlog-01
What this devlog's about
What am I doing
Since Vibe Coding and Coding Agent Tools have pierced widely into developer's daily work, I have been quite curious about how they work and how to build one by myself. So recently, I have been studying the design and implementation of Coding Agent like ClaudeCode. A good way of leaning is learning by practice, so I will not only read the theoretical documents to understand the spirit and design of a Coding Agent, but also build one by myself. Since Claude Code is basically one of the most popular product in this field and somehow it sets the standard and foundation for Coding Agent pattern, I will name this project: Klaude Code, as a way to pay tribute to the original one.
This Devlog
In this devlog, I will note down my entire learning and coding journey during I am studying the Coding Agent. Specifically, I will share my thought of what I was reading, what I thought was important, what I was confused at and what I was excited about. So if you are learning AI Agent, I hope this devlog can give you some kind of help or inspiration.
V0.1 An Minimal Implementation
Overview
In this version, I basically implemented a kind of "minimum" version of a Coding Agent with only 100 lines of code. And by what I mean "minimum version", is that Klaude Code V0.1 does not contain fancy functions like memory management, context compression, planning mode, etc. However it does have the core feature of a Coding Agent. Let me show you some demo below.
Demo
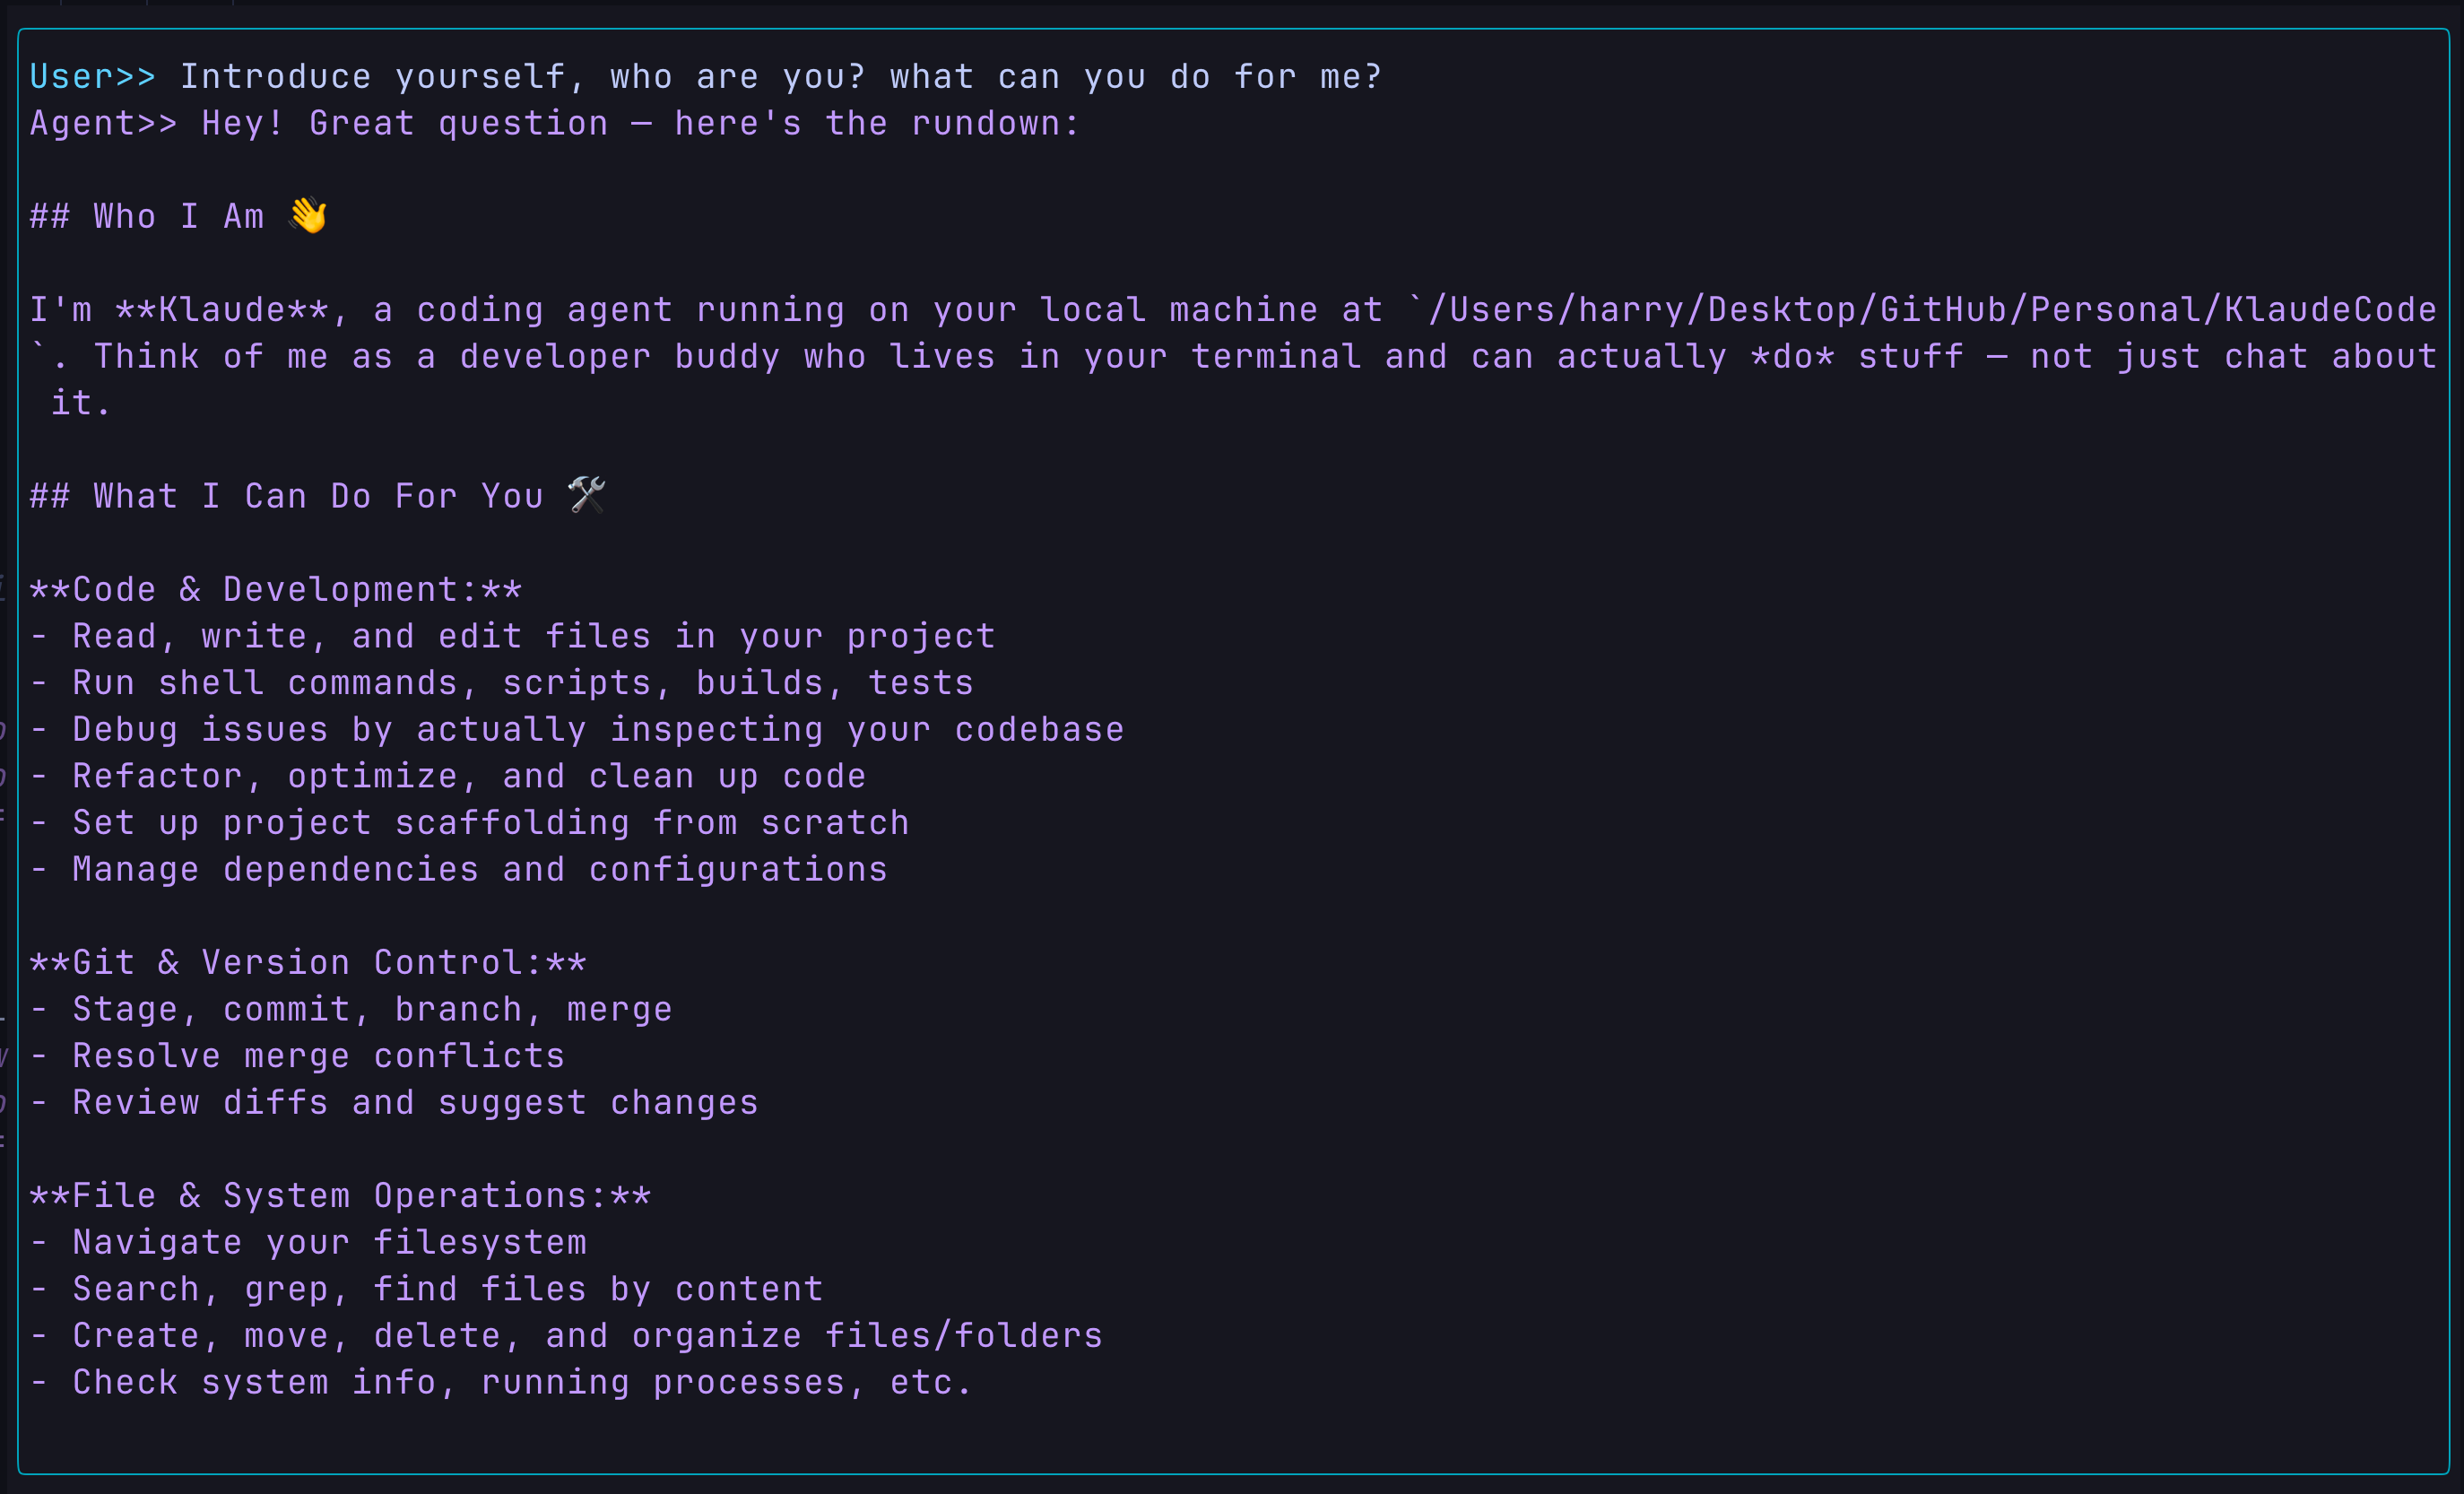
Communication:
- Prompt and Response:
Browse through the current directory:
- Prompt:
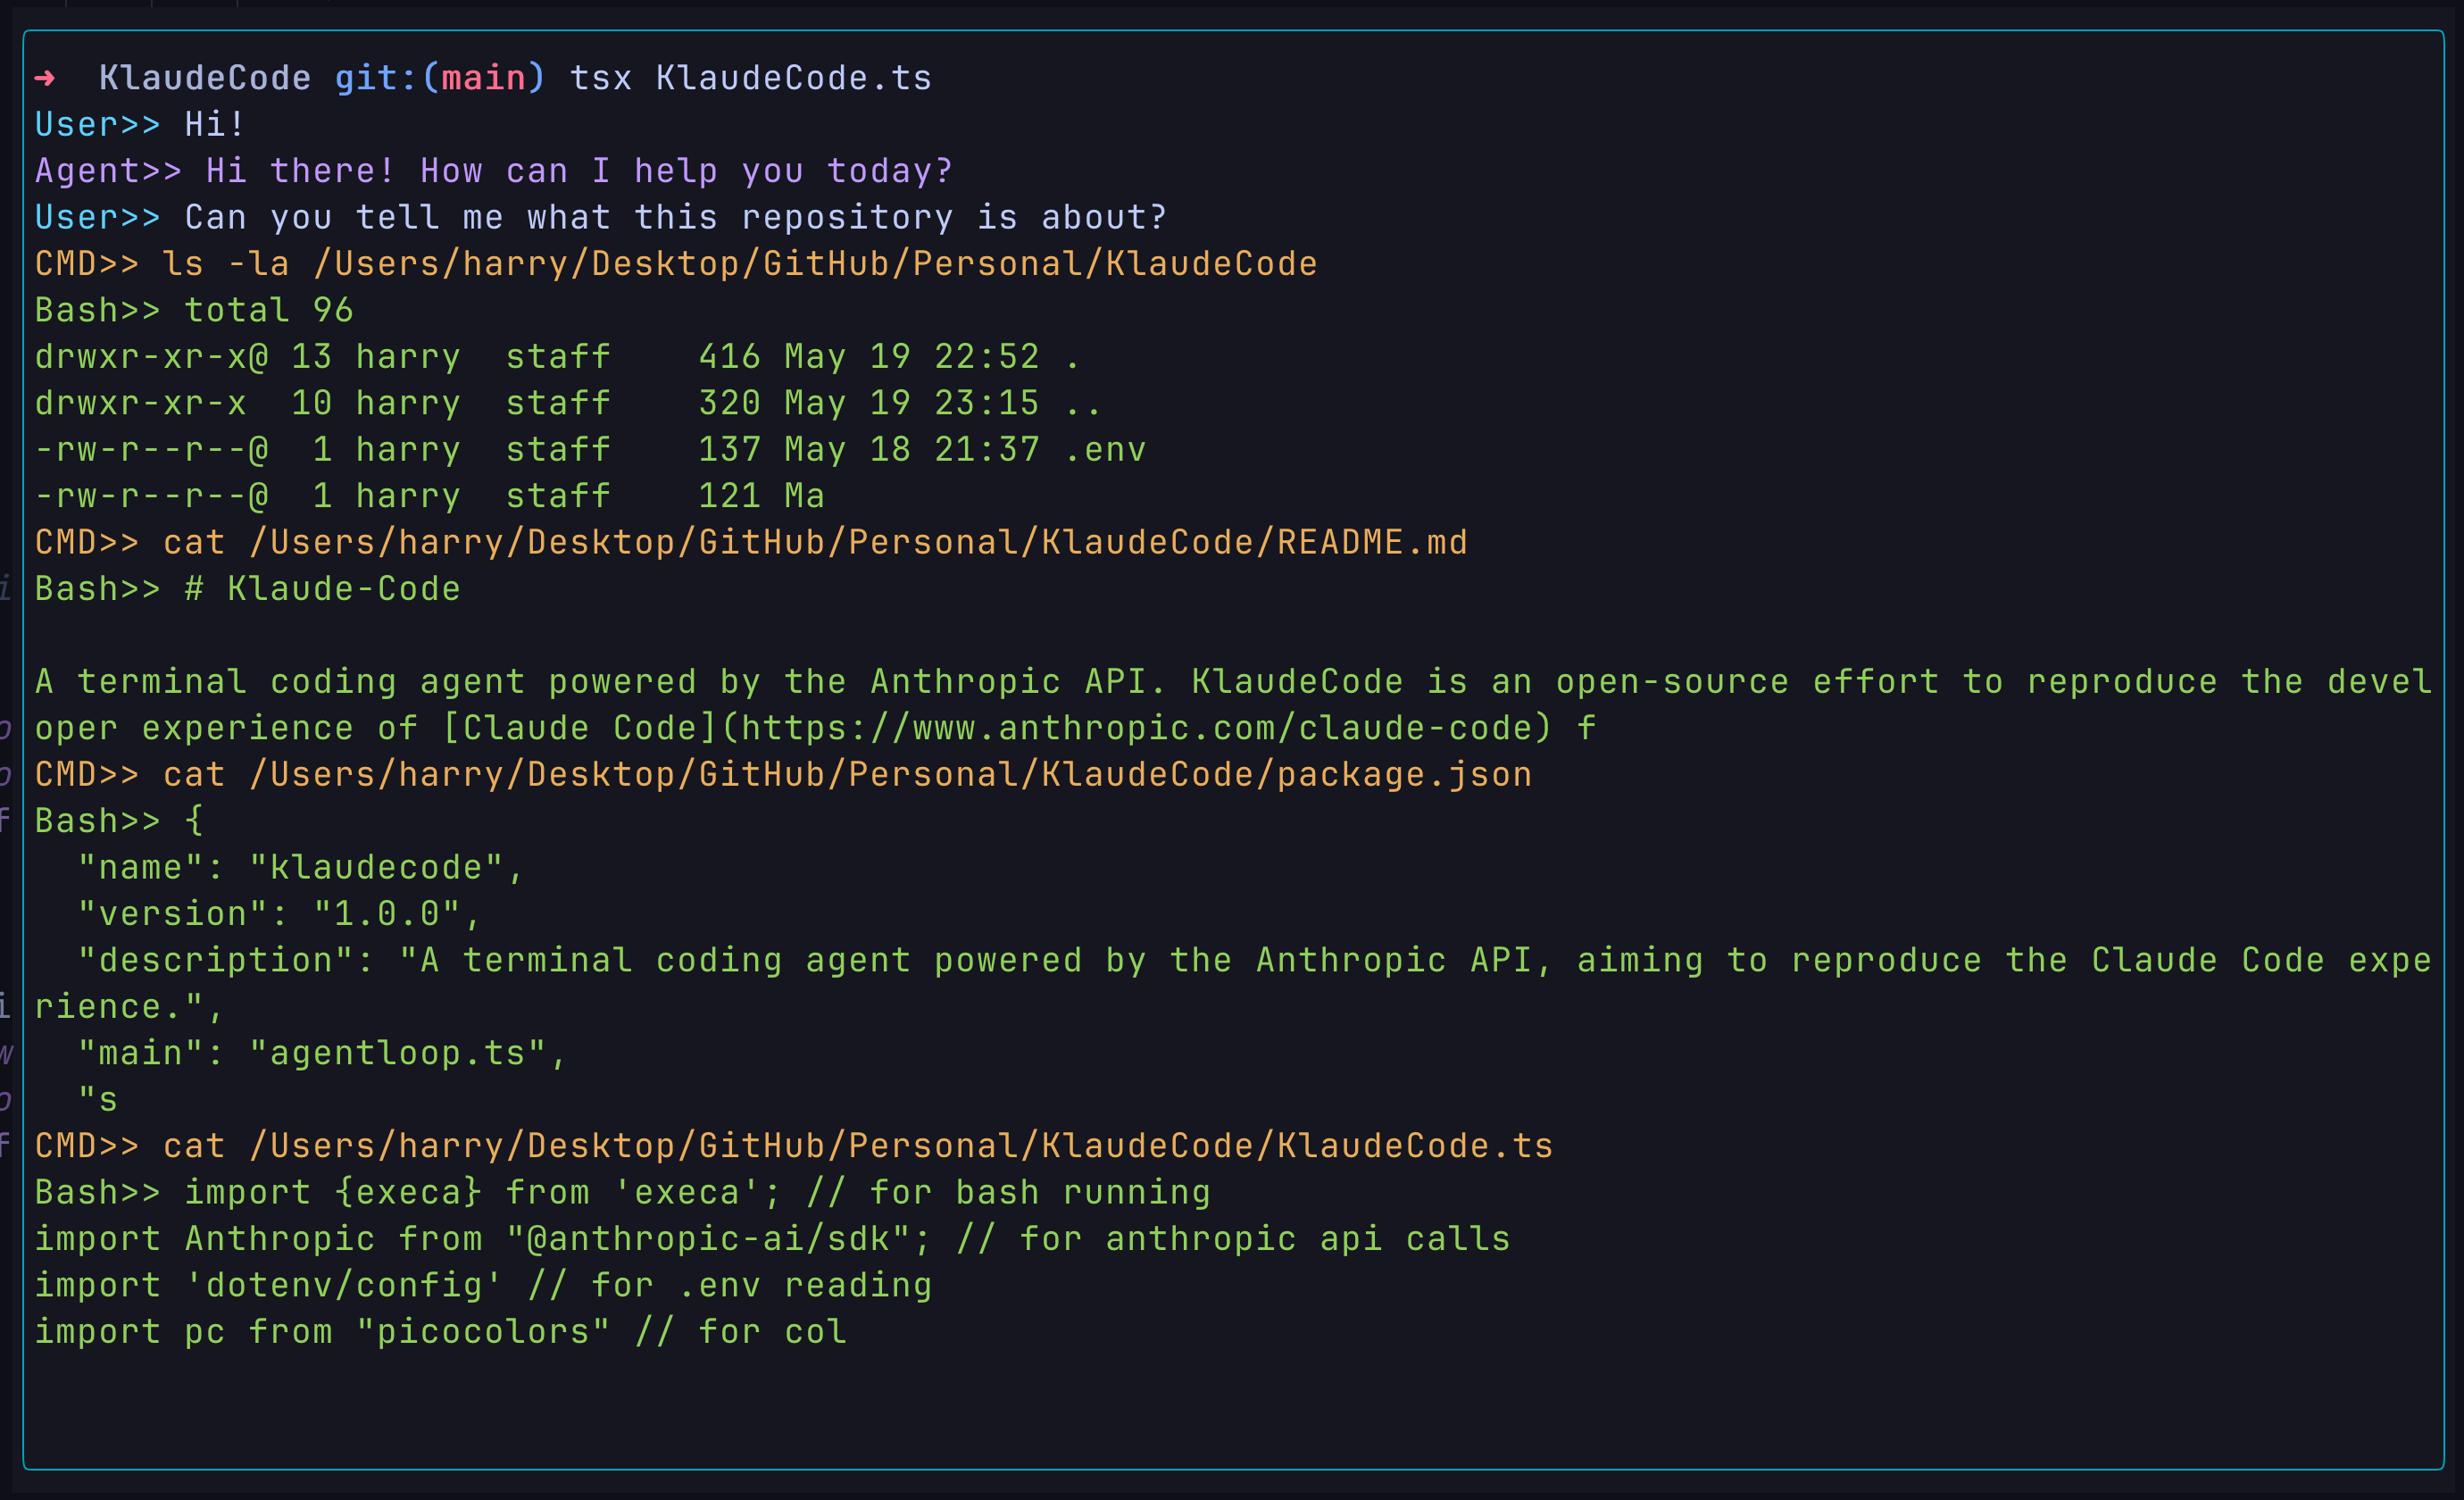
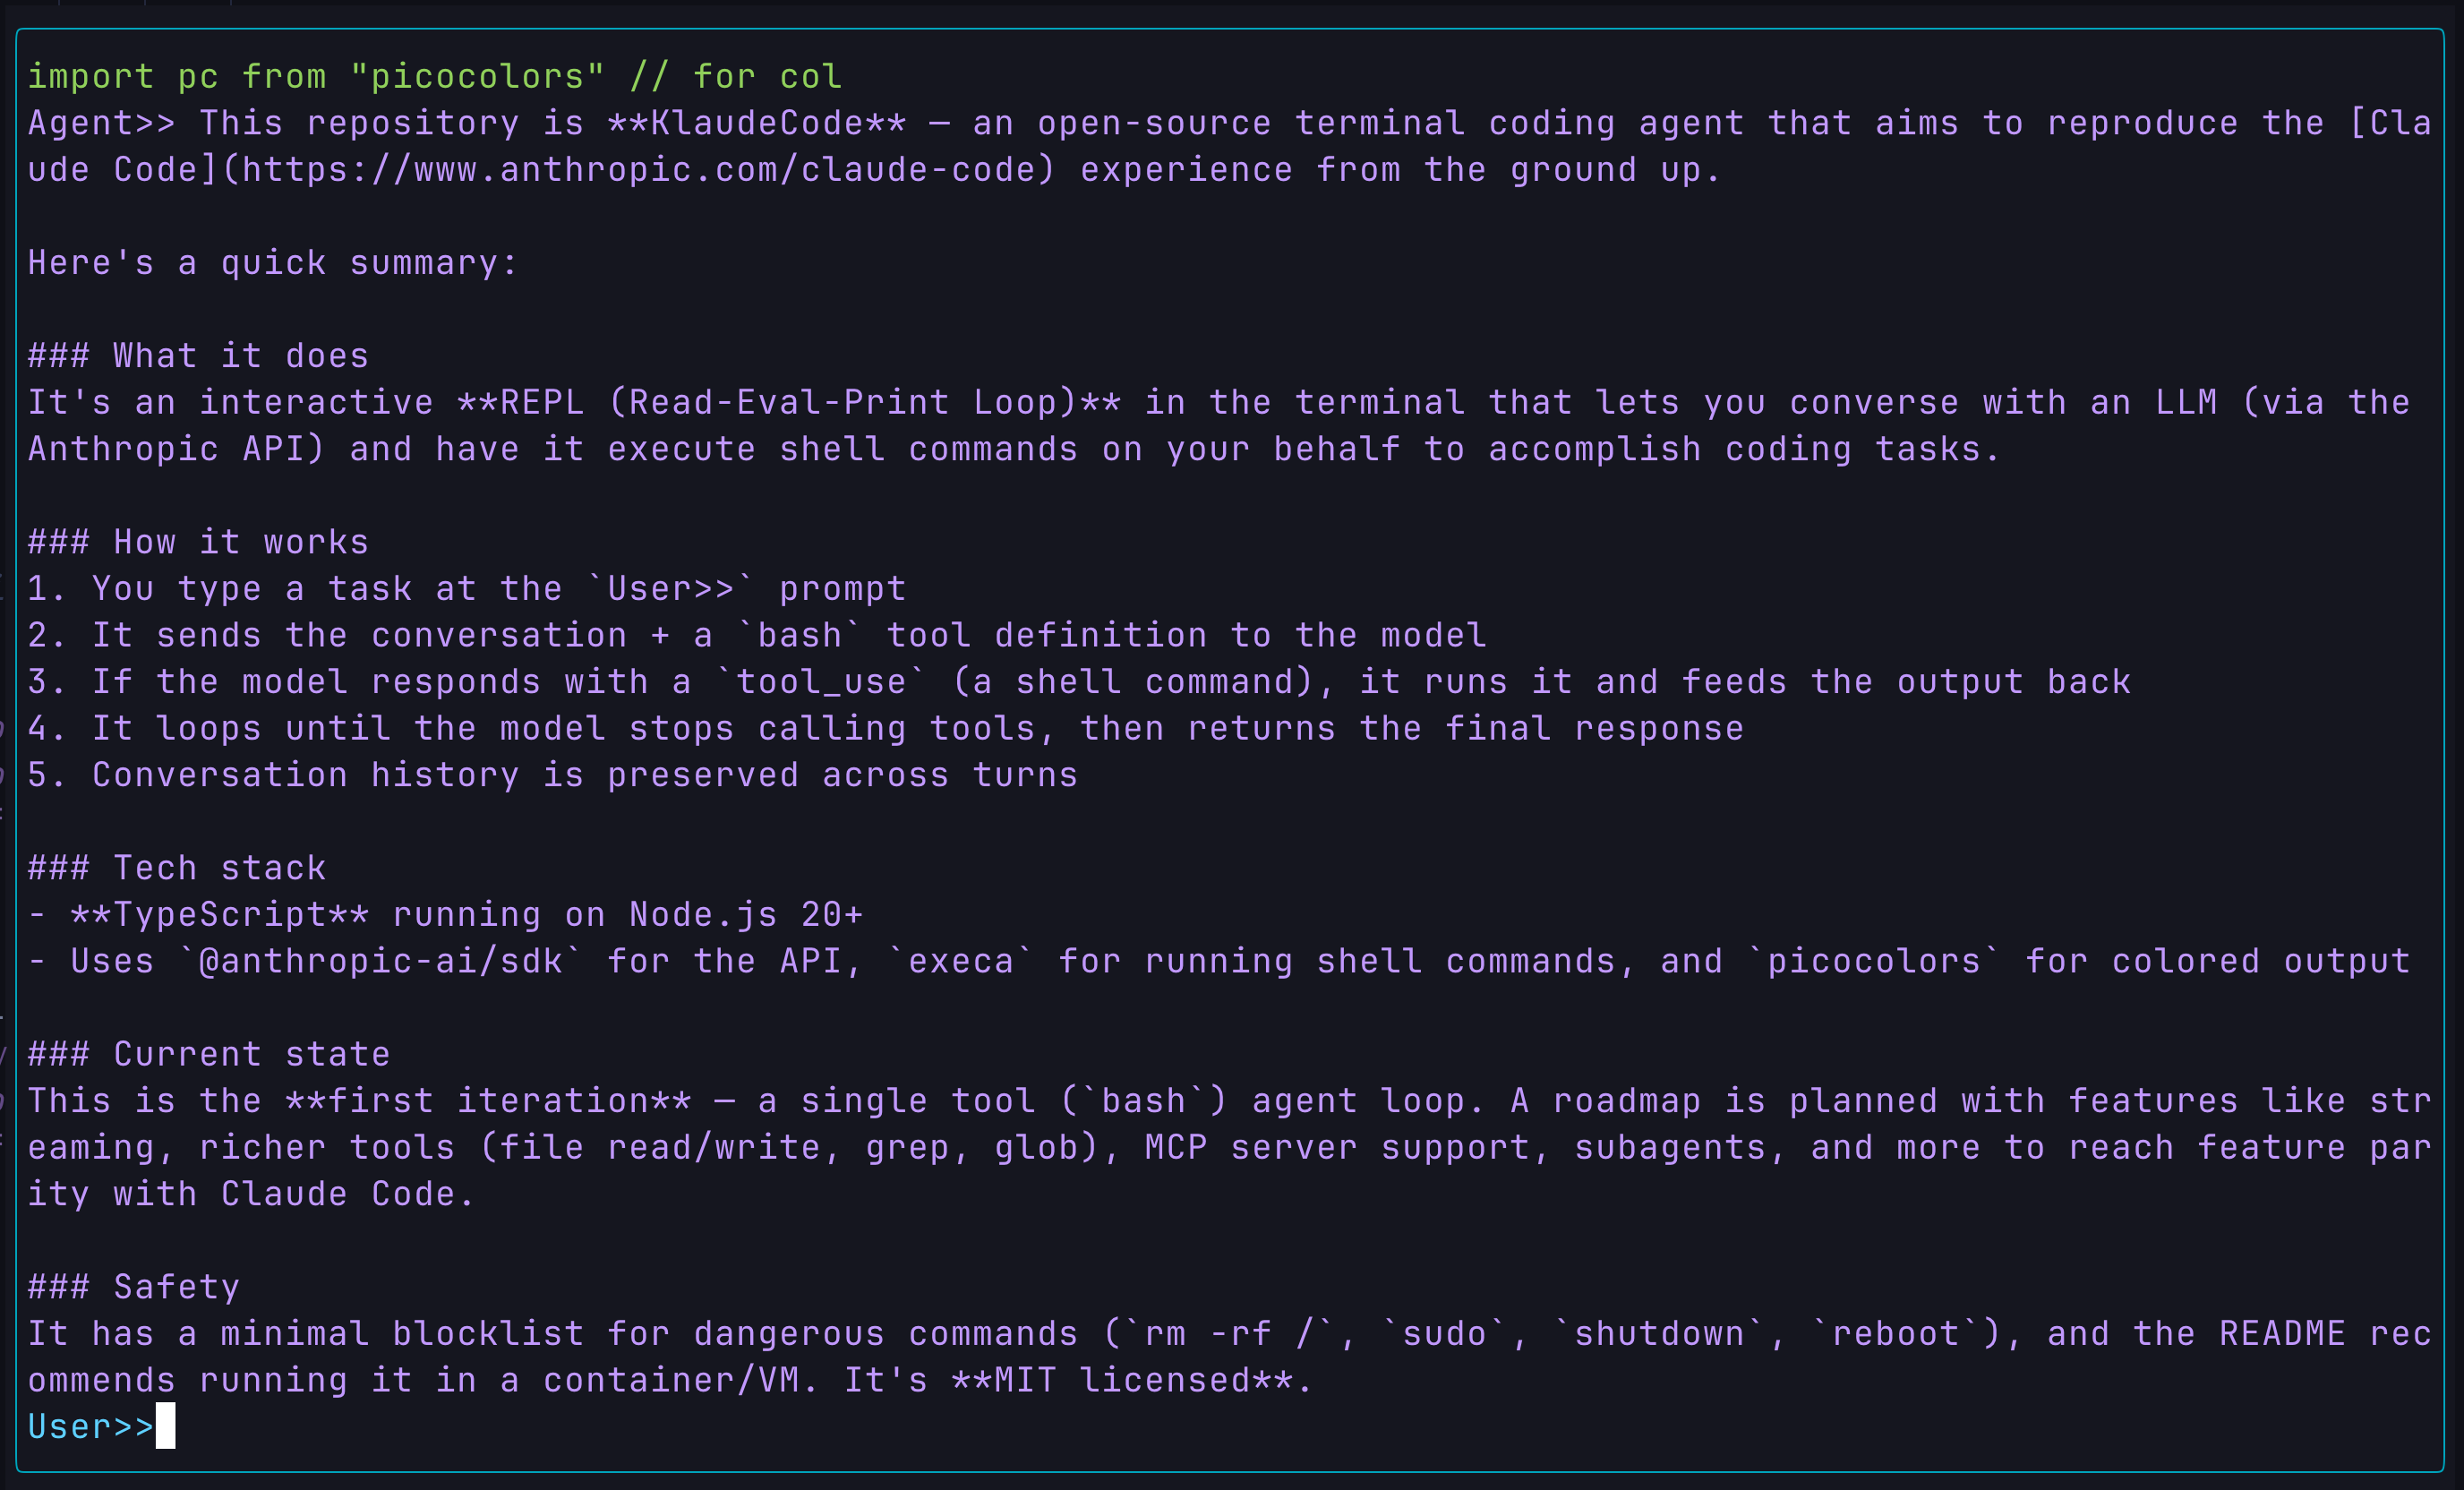
- Response:
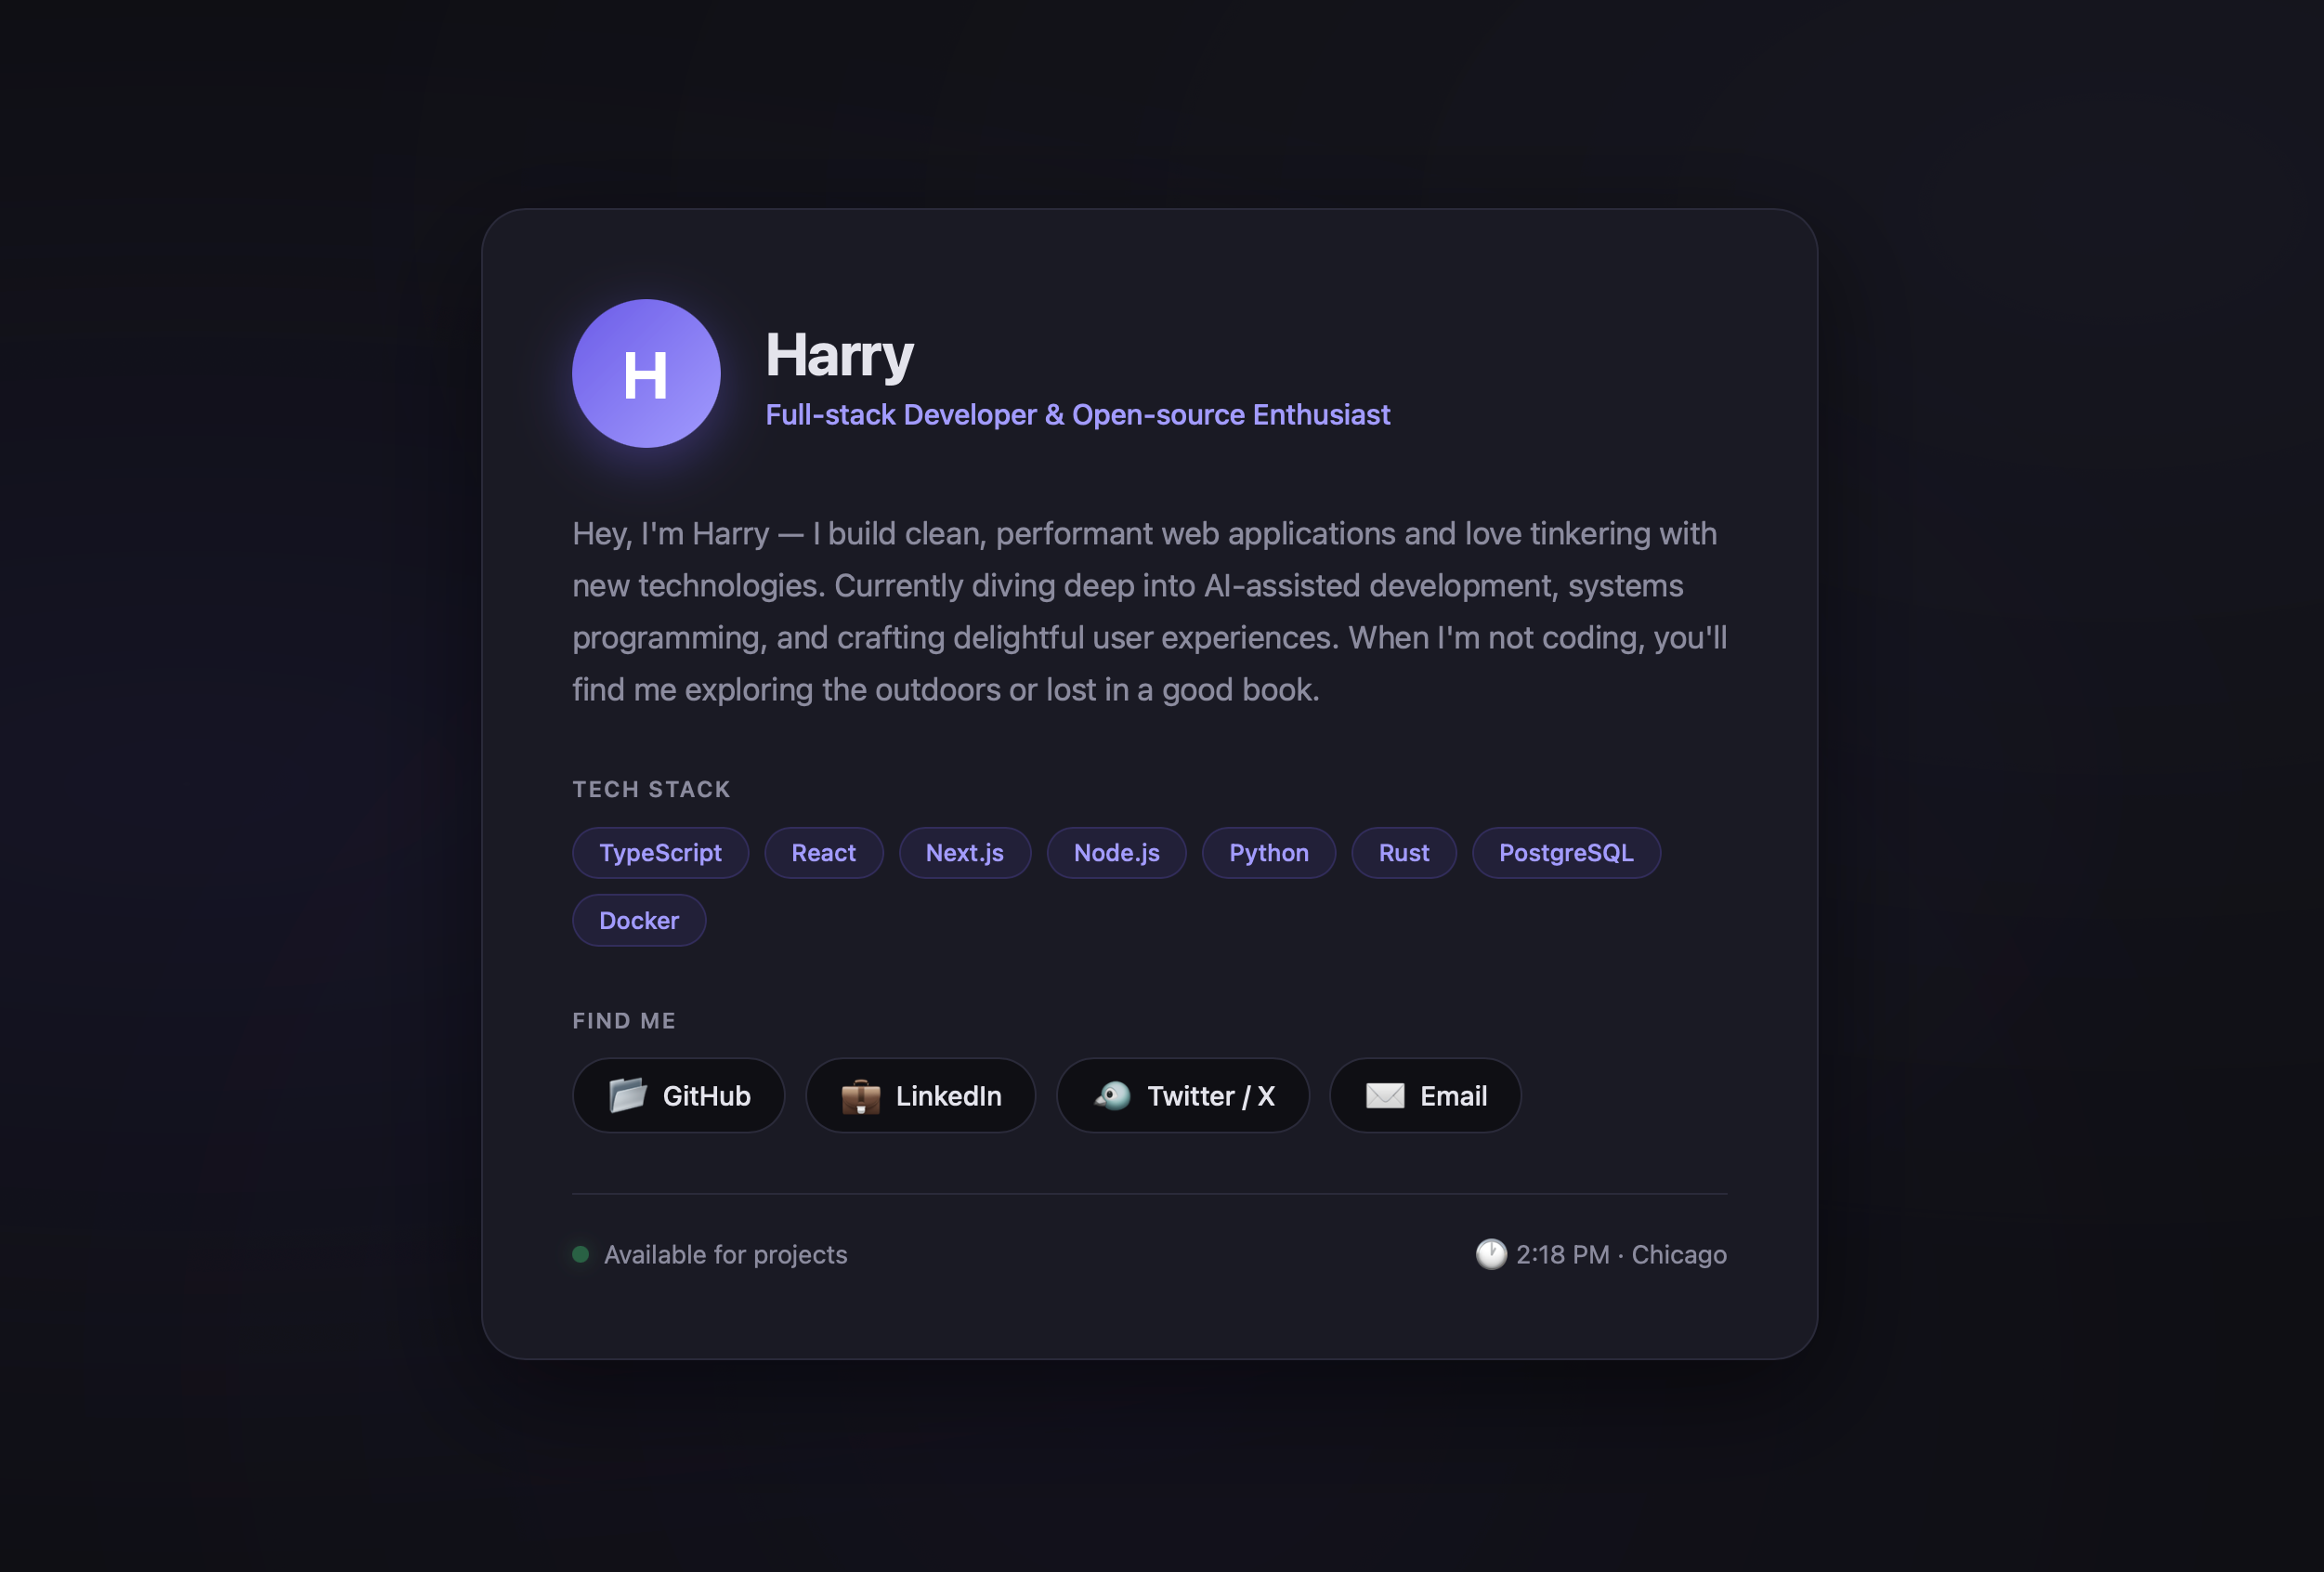
Write a website:
- Prompt:
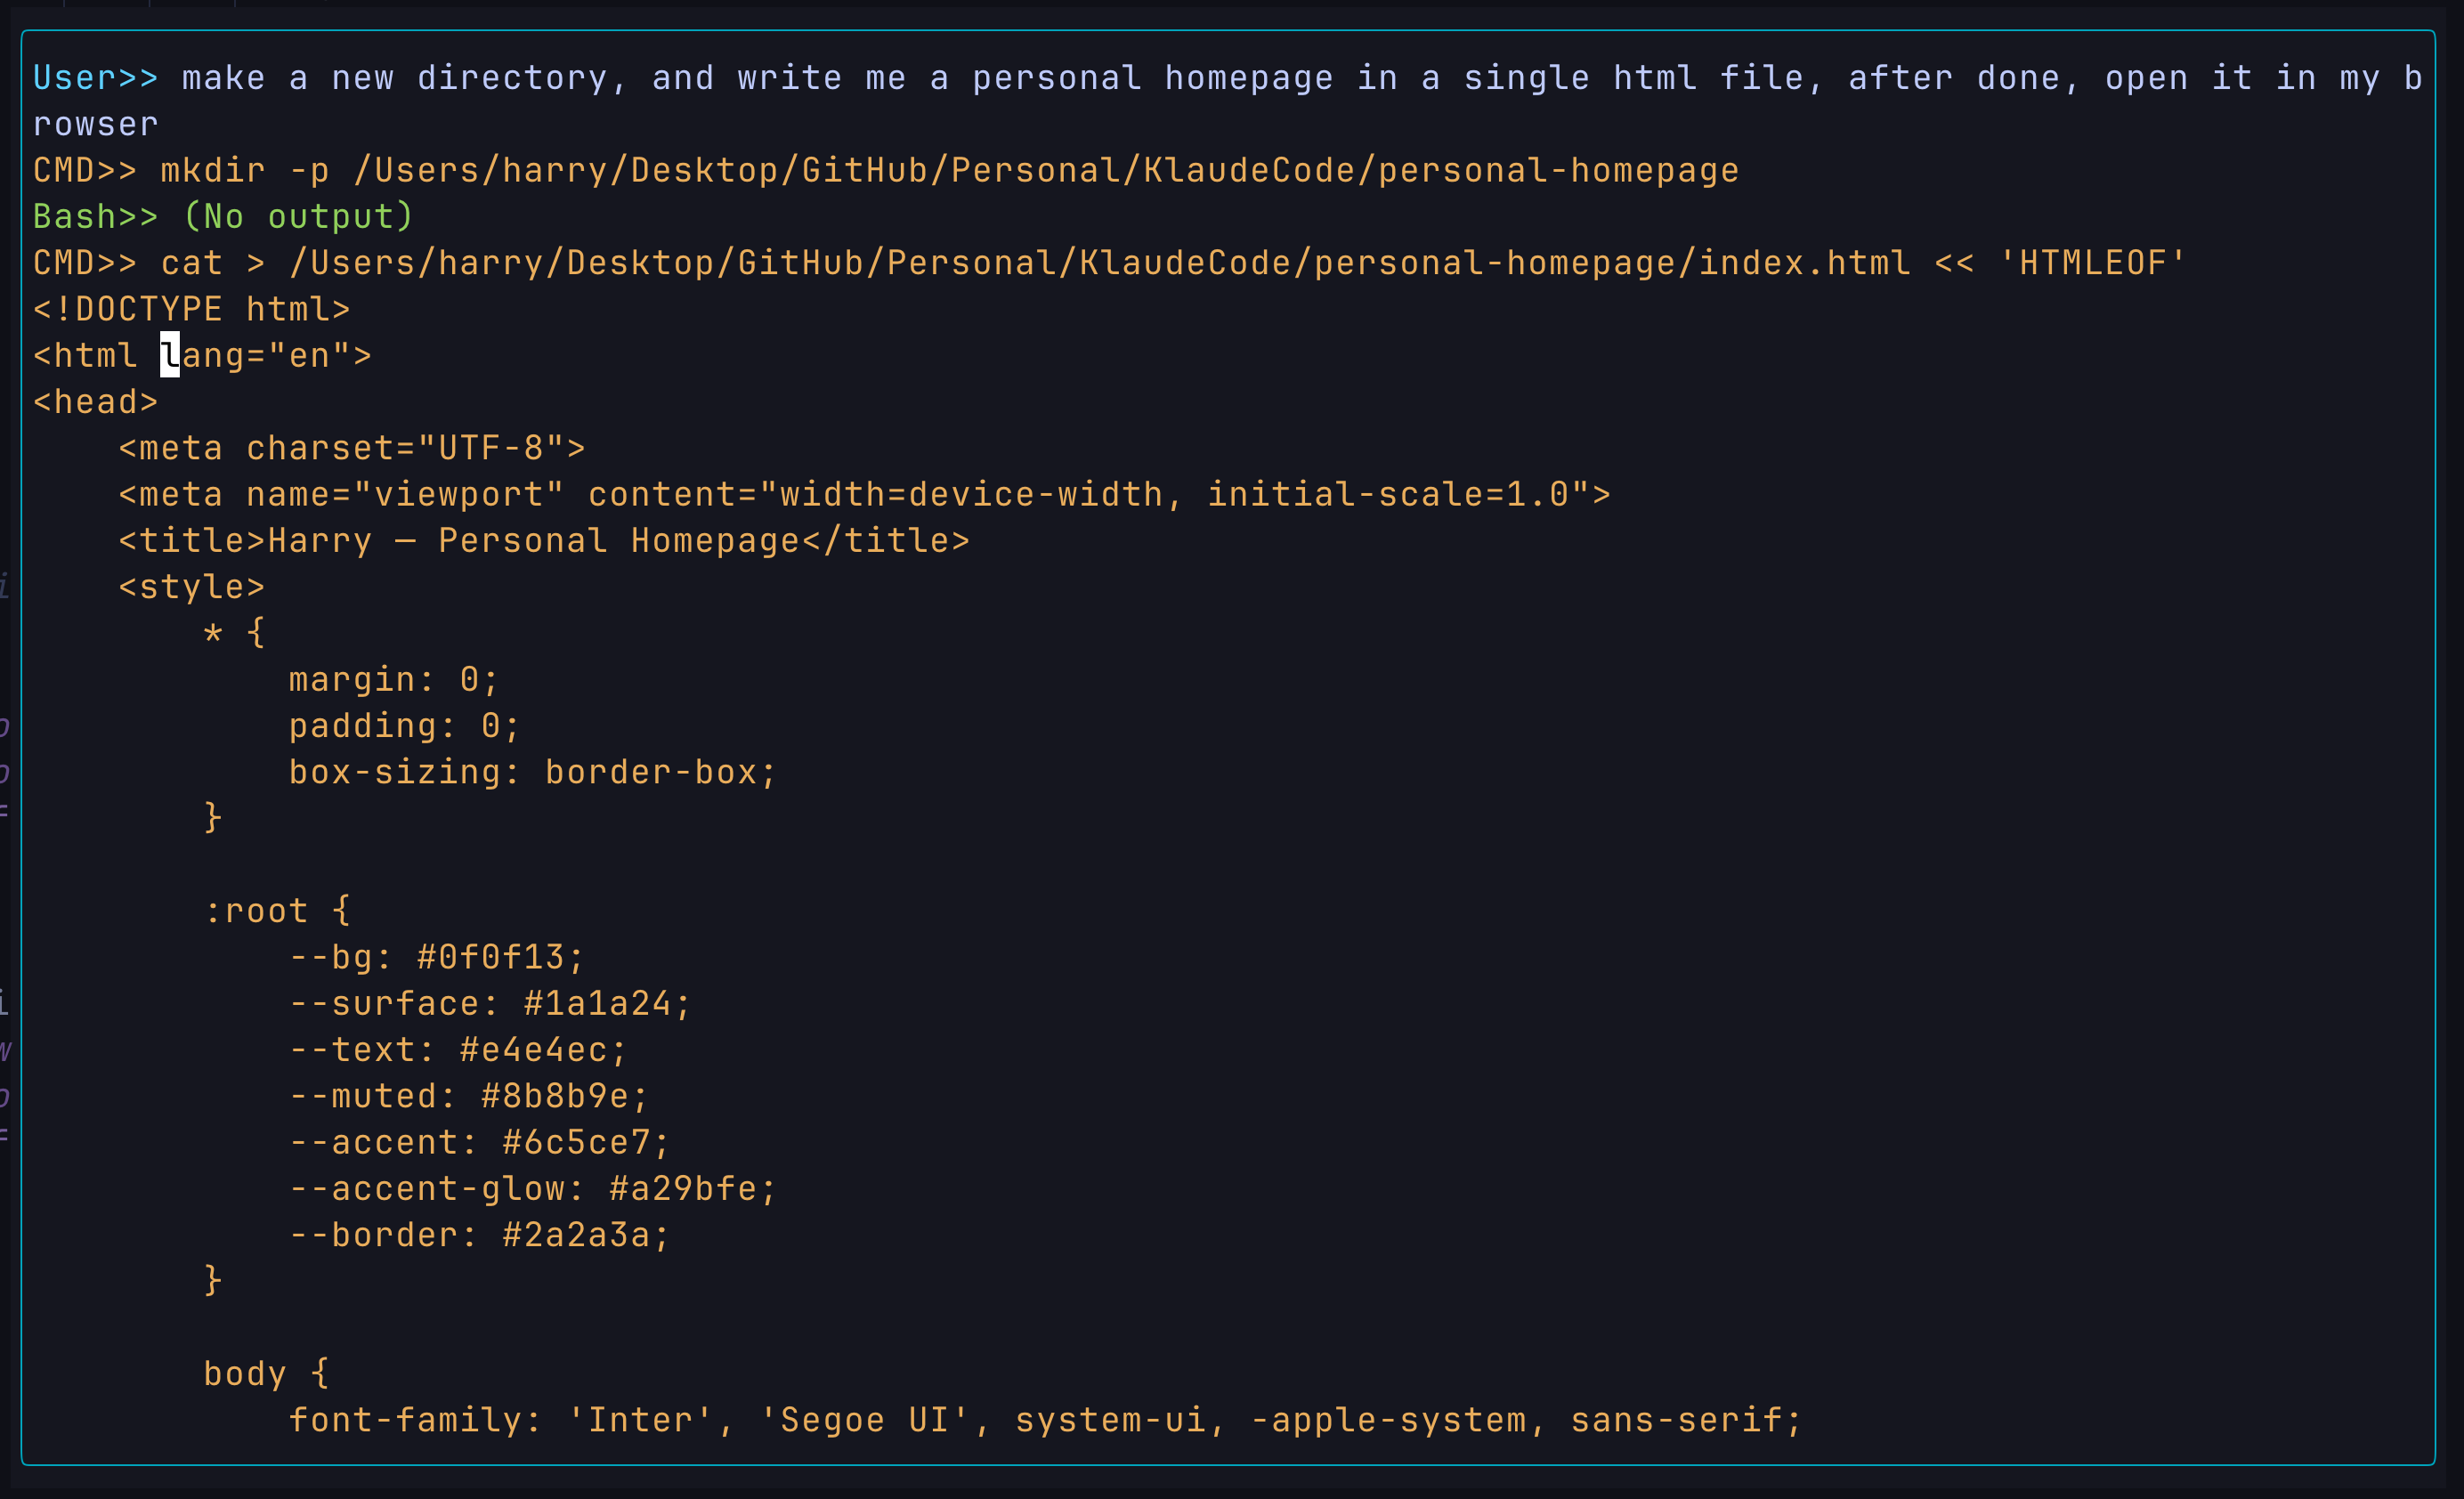
- Response:
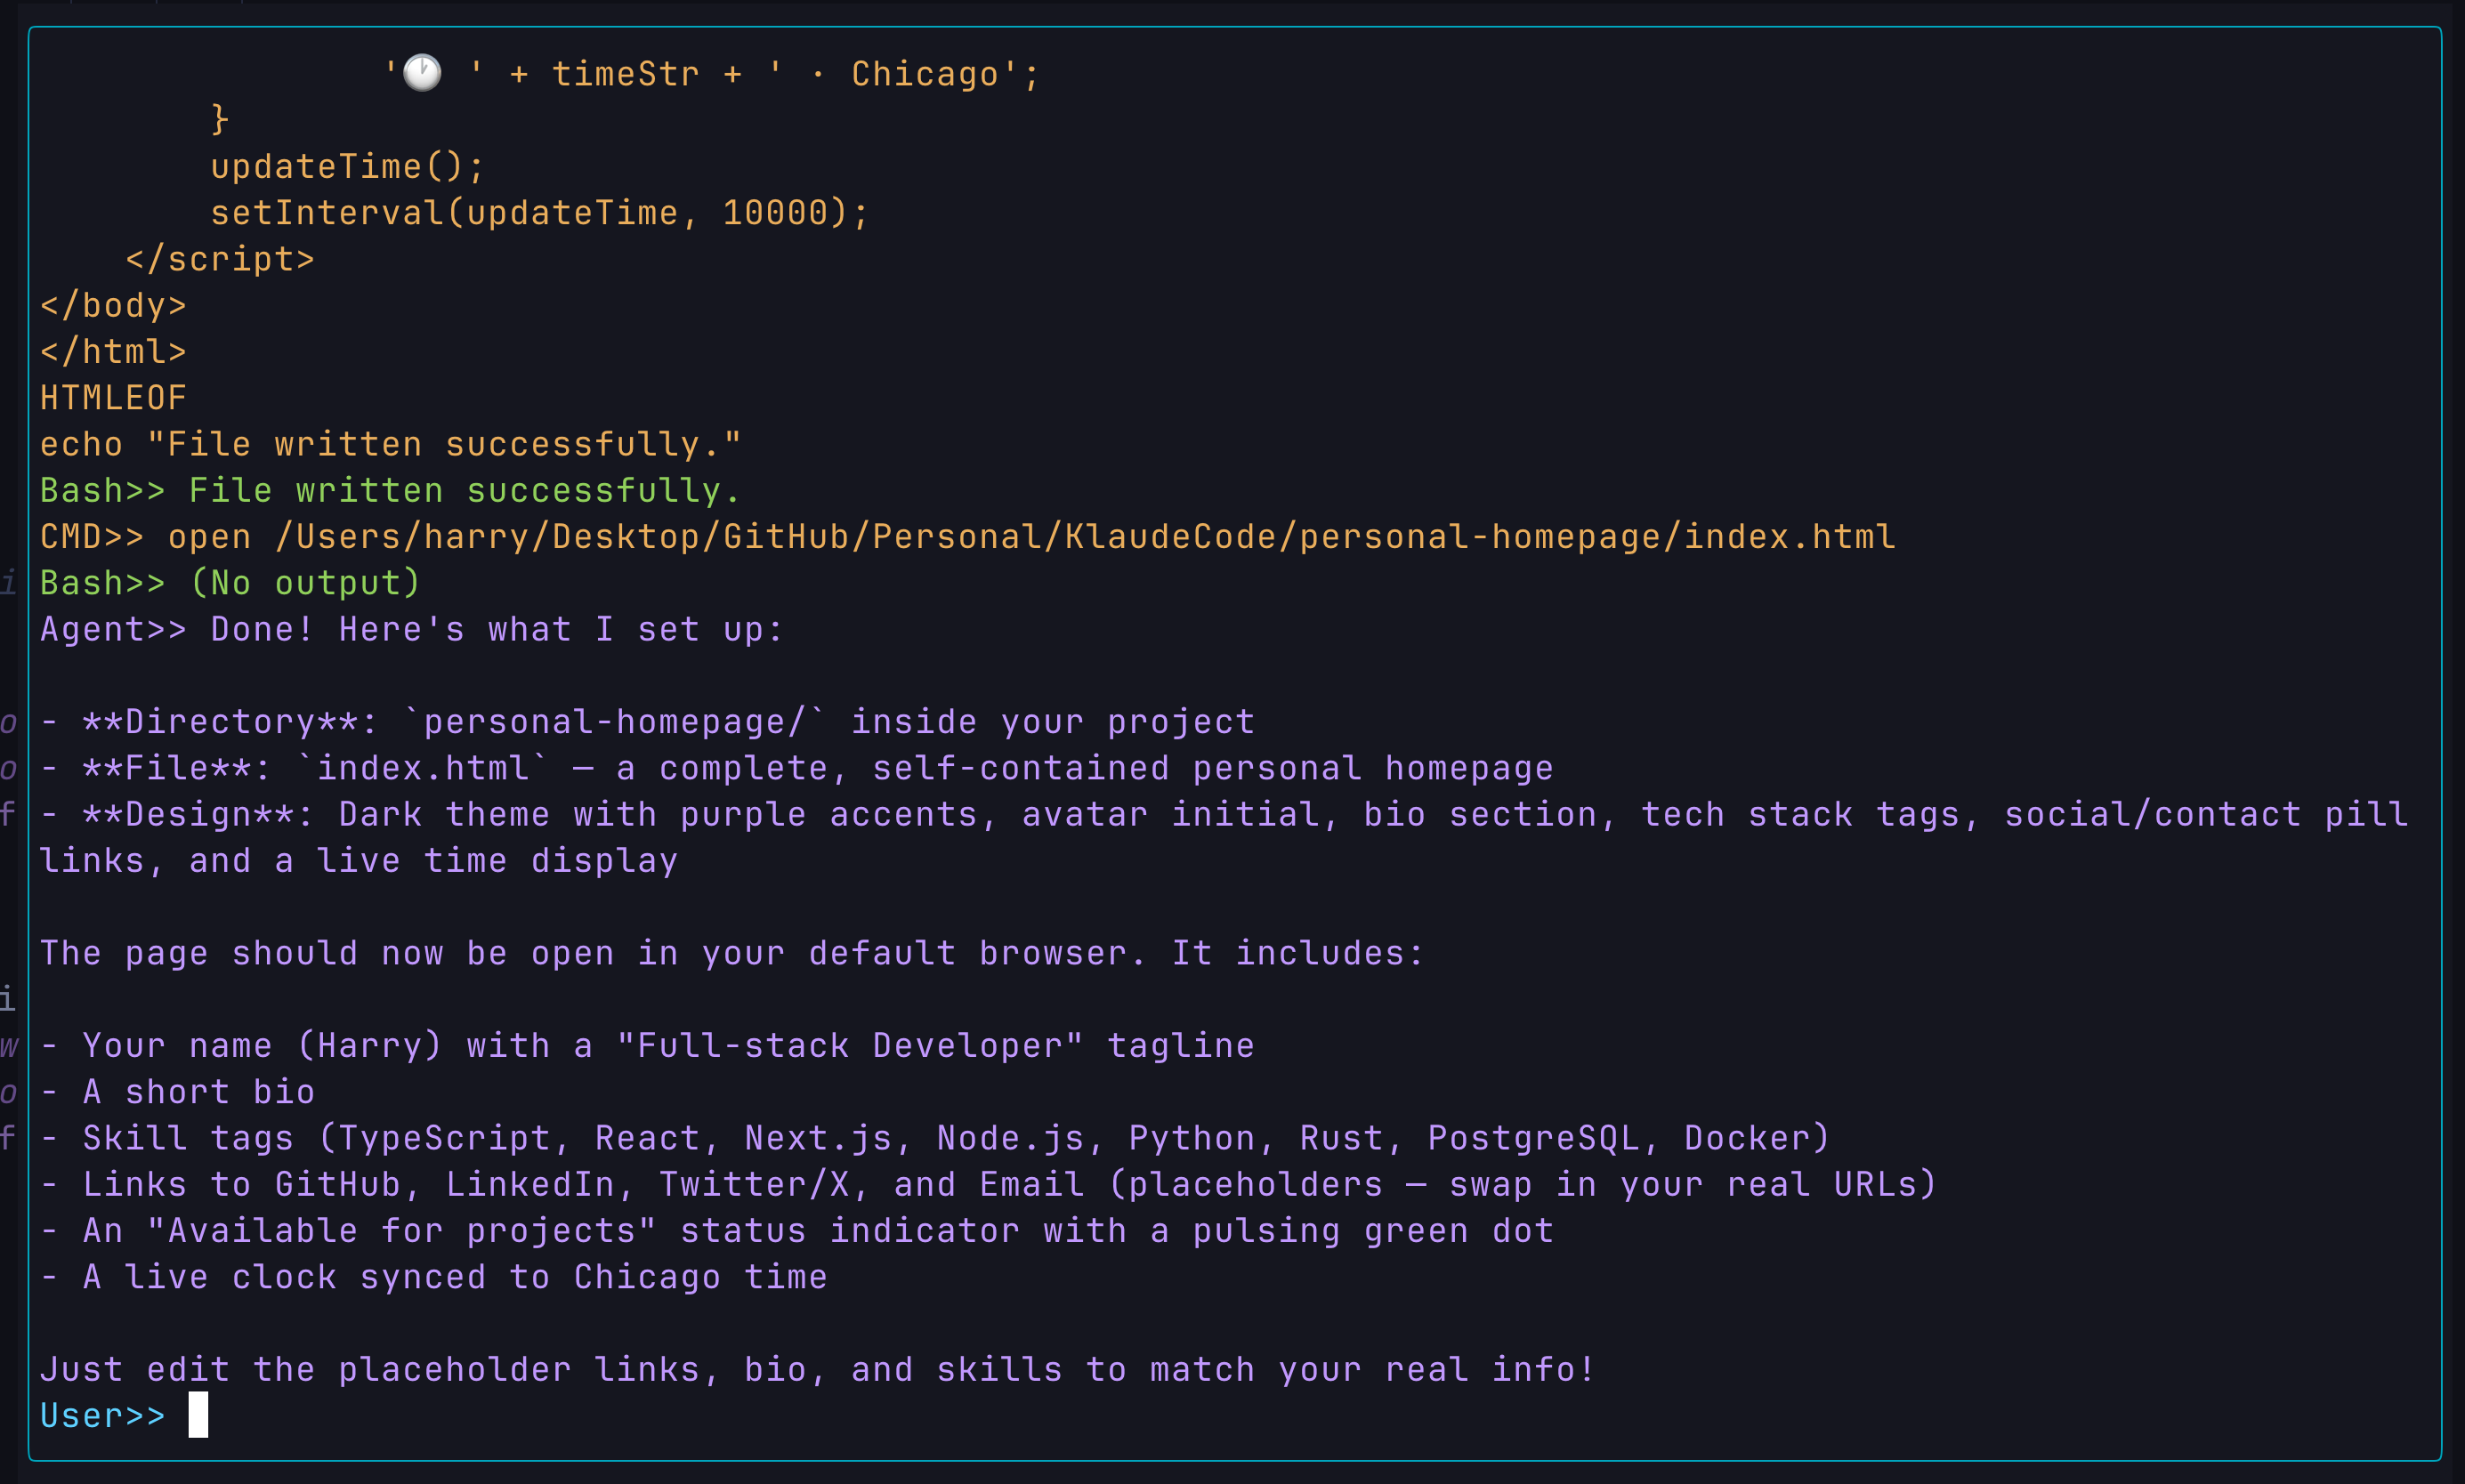
- Result:
Your Turn!
Simply copy the script beneath to your terminal to test yourself! Note that you need to fill in your Anthropic API key in the .env file.
git clone https://github.com/Kepler2024/KlaudeCode.git
cd ./KlaudeCode
npm install
cp .env.example .env # edit .env and fill in ANTHROPIC_API_KEY
npm start
Quite impressive, right? Given by the impressive performance of AI Agent like Claude or OpenClaw offer, we might think it was rather big and complex system. However here, with roughly 100 lines of code, you can see Klaude already has the ability to take your prompt, understand it, reply it. More than that, I would say it do have the ability to automate your coding workflow due to the the ability to run shell command. With the power of shell commands, the agent basically gains the ability to do everything.
- Create file through
touchcommand - Find file through
findandgrepcommand - Read file through
catcommand - Edit file through
echocommand - Start external App through
opencommand
And that's pretty much what claude do, and also what human do when they are coding! And we automate that with 100 lines of code!
What exactly is an AI Agent?
Before we dive into the code, let's first gain some insight from the 100 LOC implemented demo you just saw. The truth is, 100 lines of code indeed can not do that much things. The feature you saw:
- Intent understanding
- Decision making
- Website designing
- Code writing
is powered by the model itself. And the ability to modify files, as I said above, is powered by the shell. The model itself is already powerful enough to solve your problem, the shell is the perfect tool to be excecuted to do the work. In the past, human is the one who drive the tool, but now we wanna see AI doing it. So what we implemented does, is basically one thing: we provide the bridge between the model and the tools. We offer the brain a hand to craft. The bridge here is what typically is called: Harness.
Agent = Model + Tools + Harness.
Models are the work for LLM companies like OpenAI and Anthropic, tools are already there given by the historic development of software engineering, and the harness, are the job for us, the agent builders.
Build the minimal Harness
With 4 years of development, the model now is powerful enough to know how to solve your problem, but it's like a super genius with a disable body. So the target of harness is to provide the most powerful arm for this super genius brain. Kinda cool, right? Like the ripperdoc in Cyberpunk 2077.
In order to do that, let me introduce you the most basic but the most core concept in the design of an AI agent —— Agent Loop.
Agent Loop
So the idea is, the model takes your prompt, and it generates a response, and that's the end of a turn. Maybe the model says, "Hey, to solve this porblem I need to run the cat command to read your full file first", but that's never gonna happen, because giving this response is already a full call of your LLM.
To make that happen, we just simply need to make the turn longer. We can smartly put the response your LLM just said, back to the input of the next call, and we make a loop to keep doing that, until the model stops having the intent to use the tools, which means it thinks it's done.
FUNCTION AgentLoop(MessageHistory):
    WHILE True:
        Response := callLLM(MessageHistory)
        APPEND Response TO MessageHistory
        IF tool_use_intent IN Response:
            ToolInput := parseToolInput(Response)
            ToolOutput := runTool(ToolInput)
            APPEND ToolOutput TO MessageHistory
        ELSE:
            RETURN
The pattern looks pretty simple to understand, but here we have two new problems:
- How do we recognize tool use intent and parse the fixed tool input from the natrual-language LLM response?
- How do we run the tool with the parsed input?
Response Parsing
Intent recognition and input parsing sound actually quite tricky problems. Well they are, because LLM is just a black box which takes your input and outputs some walls of text in natrual language. What natrual language has is some randomness and ambiguity, however our code and tool can only take certain paragram.
In a hacky way, which is indeed the way engineers did in the early stage before mid-2023, we can use the so-called propmt engineering to enforce the LLM to answer in a certain format, and then we use regex and switch to match that format to recognize the intent and the input. However, this method is very easy to be broken. Firstly, at that time the context window for the LLM is like 40k, which means as the conversation goes longer, the model may just throw your carefully designed prompt out of the window. Secondly, switch can only handle one condition at a time, so if your LLM gives multiple tool use request in one response, only one of them can be excecuted and the rest will be ignored. Thirdly, this method could be very hard to maintain and scale while your tool set grows bigger in the future.
To solve this problem, OpenAI introduced a new feature to their models in mid-2023 –– function calling. And later it becomes a mainstream pattern for LLM tool using.
Function calling refines the input and output pattern of your LLM. To induce your LLM to use tools, you will need to provide the LLM a tool set when doing the LLM call, which is also in JSON format.
- TOOL:
const TOOLS: Anthropic.Tool[] = [
  {
    name: "bash",
    description: "Run a shell command",
    input_schema: {
      type: "object",
      properties: {
        command: {
          type: "string",
        },
      },
      required: ["command"],
    },
  },
];
- LLM CALL:
const response = await client.messages.create({
    ...
    tools: TOOLS,
    ...
})
The API also provides you other optional parameters to further control the response from the LLM. For example, you can set a system prompt to give the model some high-level instruction apart from the user prompt, or you can set the
max_tokensto control how long the response can be.
The above tool set is used to be read by the model, as it is passed as a parameter calling the LLM. It is in JOSN format and requires you to provide the name and description of the tool, and to use JSON Schema to set the input format of the tool and the required input. With these information, the model can thus understand what the tool is and how to use it.
Besides that, your prompt and the response you get are no longer pure natrual language anymore. They are also structured to a fixed JSON format designed by the API insisting of critical information.
Let me use a simple context as a example to show you the full process of a function calling.
-
On the Surface:

-
Prompt:
Create a file named hello.txt
- Actual Input to the API:
{
  "role": "user",
  "content": "Create a file named hello.txt"
}
- Response from the API:
{
    "type": "message",
    "role": "assistant",
    "content": [
        {
            "type": "tool_use",
            "id": "call_001",
            "name": "bash",
            "input": {
                "command": "touch hello.txt"
            },
        }
    "stop_reason": "tool_use",
}
This is just the first turn of this conversation, but it should be clear enough to show you the actual thing behind the natrual language you see on the surface, and the benefit of doing this. This format allows us to recognize the tool use intent by checking the stop_reason value, if it's tool_use then we know the LLM want to excecute a tool, and we can also parse the tool input by directly accessing the command value.
FUNCTION PARSE_INPUT(Response):
    IF Response.stop_reason != "tool_use":
        RETURN NULL
    FOR content IN Response.content:
        IF content.type = "tool_use":
            RETURN content.input.command
Run Bash
After getting the input, we still need to figure out how to run it. Luckily, this is relatively easy to be done using third-party libraries featuring running external process. For example, in python we have subprocess and in Node.js we have execa.
async function runBash(command:string): Promise<string> {
    const dangerous = ["rm -rf /", "sudo", "shutdown", "reboot"]
    if (dangerous.some(d => command.includes(d))) {
        return "Error: Dangerous command aborted."
    }
    try {
        // execute the command using execa
        const {all} = await execa({
            shell:true, // run in local shell
            all:true, // combine stdout and stderr
            timeout:120000, // 2 minute timeout
        })`${command}`
        const out = all.trim()
        // return the output, truncated to 50k characters
        // for commands without output, return "(No output)" to imform LLM the command was executed successfully
        return out ? out.slice(0,50000) : "(No output)"
    } catch (e:any) {
        if (e.timedOut) {
            return "Error: Command timed out."
        }
        return `Error: ${e.shortMessage}`
    }
}
Continuing the flow
Now we get the structured response from the LLM, we get the parsed bash input, and we successfully run the command. Next, based on what we designed the agent loop to be, we will then need to append the tool use output back to the message history. Here, the API requires that we need to push the output with the role setting to user and the type setting to tool_result acompanying with the id. Additionally, it is also good to print your command and output during the process to let user know what the LLM is actually doing, and here we import picocolor to improve readability.
You will see the full implementation below.
Full Implementation
async function agentLoop(messages:Anthropic.MessageParam[]): Promise<void> {
    while (true) {
        const response = await client.messages.create({
            messages: messages,
            tools: TOOLS,
        })

        messages.push({role:"assistant", content:response.content})

        if (response.stop_reason !== "tool_use") {
            return // end point
        }

        const results:Anthropic.ToolResultBlockParam[] = []
        for (const block of response.content) {
            if (block.type === "tool_use") {
                const cmd = (block.input as {command:string}).command
                console.log(pc.yellow(`CMD>> ${cmd}`)) // print the command
                const output = await runBash(cmd)
                console.log(pc.green(`Bash>> ${output.slice(0,200)}`)) // print the output
                results.push(
                    {
                        type: "tool_result",
                        tool_use_id: block.id,
                        content: output,
                    }
                )
            }
        }
        messages.push({role:"user", content:results})
    }
}
Main Function
The main function takes all the other duty except the core agent feature itself. In this version of Kalude Code, this includes maintaining the messages history array, handling the user input, offering a simple UI, excecuting the agent loop, and print the conclusional result from the LLM. Here we import readline from Node.js to provide a terminal chatting experience.
const history:Anthropic.MessageParam[] = [] // the whole context
const rl = readline.createInterface({ input, output });
while (true) {
    const query = await rl.question(pc.cyan("User>> "))
    if (!query || query.toLowerCase() === "quit") {
        console.log(pc.red("Agent Terminated."))
        rl.close()
        break
    }
    history.push({role:"user", content: query})
    await agentLoop(history) // the context will be full after the loop ends
    const finalResponse = history[history.length - 1].content // print the final response from the LLM, which will be concluding
    // the final response can be either string or array of blocks
    if (typeof finalResponse === "string") {
        console.log(pc.magenta(`Agent>> ${finalResponse}`))
    } else {
        for (const block of finalResponse) {
            if (block.type === "text") {
                console.log(pc.magenta(`Agent>> ${block.text}`))
            }
        }
    }
}
My Thoughts
That's pretty much what I have done for the V0.1 of Klaude Code, and I hope my explanation can give you a clear picture of how the core feature of a Coding Agent works.
Below is the insight (might be wrong) I got at this stage during the process of learning AI Agent and building this V0.1 of Klaude Code.
- Bash is super powerful, enough to do most of the critical job solving the problem.
- Your harness is highly dependent on the regulation of the API, which kind of make me feel like the API provider is actually the real agent builder. It is not you who designed the pattern, the API provider already did it for you.
- Current AI agent projects on the market, no matter it's an open-source one or a product, they are basically based on the same design pattern, and doing the same thing. The difference are highly comes from the model.
Ending
Thanks for your reading! This is actually my first technical blog ever, and I hope it's not that bad. If you have any suggestion or want to share your thought about this topic, feel free to visit my personal website https://harrykepler.com and contact me there. And I will appreciate it a lot if you can support and star my Kalude Code project on github!